Decluttering your space can feel overwhelming, but it doesn't have to be a daunting task. Start by selecting one area to tackle at a time. Whether it’s a shelf, drawer, or corner of your studio, focusing on small spaces can make the process more manageable. Begin by removing everything from that area, giving you a clear view of what you have and allowing you to evaluate each item.
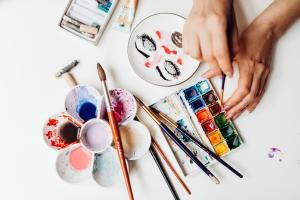
Once you've cleared the space, sort your art supplies into categories. Separate your paints, brushes, papers, and tools. This not only helps you see what you own but also makes it easier to identify duplicates or items you no longer need. Consider using small bins or boxes for each category. Labeling these containers can also help you find what you need quickly, keeping your work area tidy and efficient.
Next, get creative with your storage solutions. Repurpose items you already have at home, like mason jars for brushes, or shoe boxes for storing paper. Hanging organizers can be a great way to utilize wall space for supplies that are often used, while vertical shelving can showcase your collection without taking up too much floor space. Don’t forget to leave some empty space for new items or ongoing projects!
Finally, establish a routine to keep your space clutter-free. Set aside a few minutes at the end of each day to put things back in their designated spots. Encourage yourself to regularly reassess your supplies and get rid of items you no longer use. Maintaining a clutter-free environment will inspire creativity and help you focus on what matters most: your art!
Creative Storage Solutions for Artists
As an artist, keeping your supplies organized can often feel like a daunting task. Creative storage solutions not only help you maintain a clutter-free studio but also inspire your creativity. One great way to start is by using repurposed materials, such as old jars or tin cans. These can be transformed into stylish containers for brushes, pencils, and other small tools. Paint them in bright colors or add labels to give them a personalized touch that complements your artistic vibe.
Another innovative approach is to utilize vertical space. Wall-mounted shelves or pegboards can showcase your supplies while keeping them easily accessible. You can hang your favorite paints, tools, or even finished pieces as a part of your decor. This method not only makes use of otherwise unused space but also turns your supplies into an artful display that sparks inspiration whenever you enter your creative space.
For larger supplies, consider using multi-tiered carts. These rolling organizers can be moved around easily, allowing you the flexibility to set up your workspace as needed. Fill each tier with different materials—one for paints, another for canvases, and a third for sketchbooks. This system keeps everything organized and encourages you to use all your materials regularly, reducing the chances of letting supplies collect dust in the corners of your studio.
Lastly, don't overlook the power of clear storage bins. These can be labeled and stacked to make finding what you need a breeze. The transparency allows you to quickly see what's inside, and it can save time when you're in the middle of a project. Arrange bins by color or type of medium, making it easier to select the perfect tool or material to bring your next masterpiece to life.
Essential Organizing Tips for Supplies
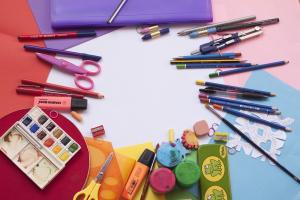
Organizing your art supplies doesn't have to be overwhelming! With a few essential tips, you can create a space that inspires creativity and makes it easy to find what you need. Start by grouping similar items together. For example, gather all your paints in one place, your brushes in another, and your sketchbooks in a separate area. This way, when you're ready to work on a project, you won’t lose time searching through a chaotic jumble of materials.
Next, consider using clear containers or jars for smaller items. This allows you to see exactly what you have at a glance. Label each container with its contents, so you can quickly grab what you need without digging through stacks. You can even get creative with your labels—use colorful tape or decorative sticky notes to add a personal touch!
Vertical storage is another great way to save space and keep your supplies organized. Use wall-mounted shelves or pegboards to display items like scissors, rulers, and washi tape. Not only does this free up your desk space, but it also makes it easy for you to access your most-used tools while keeping everything visible and tidy.
Finally, set aside time regularly to declutter your art supplies. Just like any other space, your organizing system will benefit from a little upkeep. Spend a few minutes each month checking for items you no longer use, and make room for fresh supplies that will inspire your next artistic adventure. Maintaining an organized environment will help keep your creativity flowing!
DIY Projects for Better Art Storage
If you're an artist, you know how important it is to keep your supplies organized. Not only does it save time when you're in the creative zone, but it also protects your materials from damage. Here are a few DIY projects that can help you create better art storage solutions right at home.
One easy project is to repurpose old jars or containers. You can paint them or label them with the contents to give your shelf a personalized touch. Use these jars to store brushes, pencils, or even small tubes of paint. Stack them on a shelf or place them on a lazy Susan for easy access. This way, you’ll always be able to find what you need without rummaging through messy drawers.
Another clever idea is to build a simple pegboard wall above your workspace. This versatile storage solution allows you to hang up supplies like scissors, rollers, and palettes. You can customize the layout by using hooks, baskets, or shelves to keep everything in sight. Plus, it adds an artistic flair to your studio! Just paint the pegboard in a color that complements your decor.
If you have a bit more time on your hands, consider making a rolling cart. With some wood and wheels, you can create a mobile storage unit that can be easily moved around your workspace. Use different levels to separate various supplies like paints on one shelf and sketchbooks on another. This convenience allows you to keep everything you need at your fingertips while working on your next masterpiece.